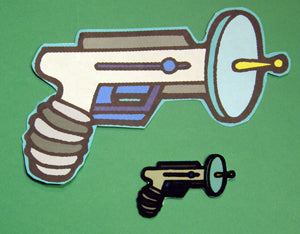
Create personalized glow-in-the-dark charms and keychains at home. This specialized inkjet film shrinks to roughly 1/3 its original size and hardens into durable, light-charged plastic. Perfect for custom jewelry, ornaments, and high-visibility zipper pulls.
Printable Glow Shrink Film – 8.5" x 11" (3 Sheet Pack)
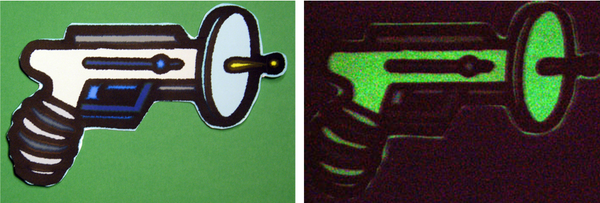
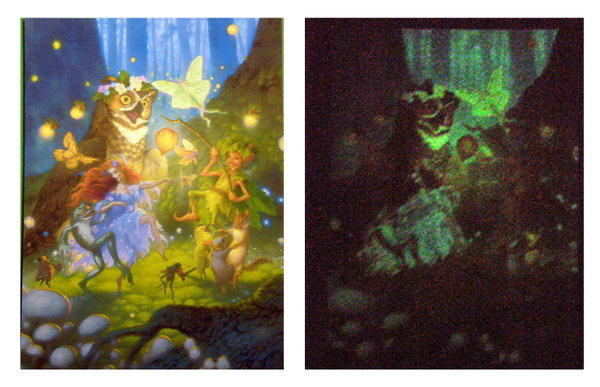
Transform your digital designs into glowing, rigid plastic art. This film handles like standard paper in your inkjet printer but transforms in the oven into a thick, durable material. The built-in phosphorescent properties allow your finished pieces to "charge" under any light source and glow brightly in the dark, making it an ideal medium for unique craft projects and personalized gifts.
🔥 The 3-Step Creation Process
- Print or Draw: Use your inkjet printer (set to "Matte Photo Paper"). Tip: Lighten your image by 20% before printing; colors become much more saturated and darker once the film shrinks.
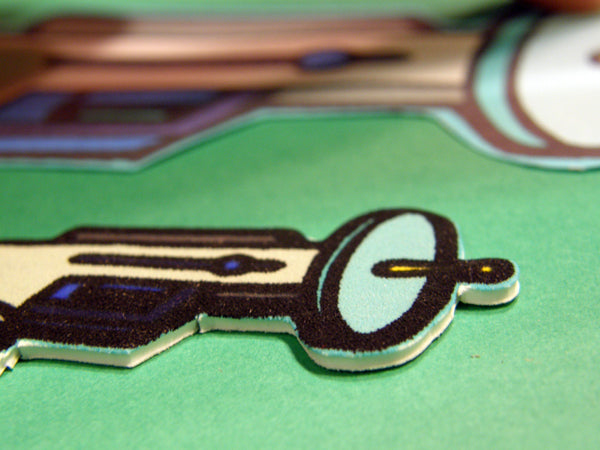
- Cut & Punch: Cut out your designs with standard scissors. To make a charm, punch a hole before baking—it will shrink perfectly into a small jewelry-sized opening.
- Bake & Harden: Place in a preheated oven (350°–400°F) for 1-2 minutes. The film will curl and then flatten as it hardens. Once flat, it is finished!
Creative Inspiration
Custom Jewelry
Create glowing earrings, pendants, or friendship bracelets that stand out at night or under blacklight.
Safety & Kids Gear
Turn a child's drawing or a favorite character into a glowing zipper pull for backpacks and jackets.
Frequently Asked Questions
Can I use this in a Laser printer?
No. This film is designed strictly for Inkjet printers. The high heat of a laser fuser can melt the film and damage your machine's internal components.
Why did my art curl while baking?
Curling is a normal part of the shrinking process. The plastic will curl as it reacts to the heat and then naturally settle back down flat. If it stays slightly curved, you can gently press it flat with an oven mitt immediately after removal.
How do I make the glow stronger?
The film is charged by UV or ambient light. For the brightest effect, hold your finished charm under a lamp or in direct sunlight for a few moments to "charge" the phosphorescent particles.
Note: For use in standard or toaster ovens only. Do not use in a microwave.
You might also like
