
Create professional dry-rub transfers from your own inkjet or laser printer — no water, no soaking, no mess. These printable rub-on decal kits allow you to apply high-detail graphics, text, and full-color photos directly onto wood, metal, glass, ceramics, and furniture with just a burnishing stick and light pressure. The result is an incredibly thin, durable film that looks painted on rather than applied.
Kit Contents: 3 sheets frosted transfer film + 3 adhesive liner sheets + 1 professional burnishing stick. 8.5" x 11". Inkjet & laser compatible.
Printable Rub-On Decal Transfer Kit — Dry Transfer Paper for Wood, Furniture & Crafts
Each kit includes frosted printable transfer film, high-tack adhesive liners, and a professional wood craft burnishing stick — everything needed to create a clean dry transfer from your home printer. Because this is a dry application with no water required, it works on porous surfaces like untreated wood and delicate antique furniture where moisture could cause damage. A true waterslide alternative for projects that demand a painted-on decal look. Also compatible with rubber stamps and hand-drawing for non-printer applications.
📐 Kit Contents & Specifications
- Transfer Film: 3 Sheets Frosted Printable Film — 8.5" x 11"
- Adhesive Liners: 3 High-Tack Adhesive Liner Sheets
- Tool: 1 Professional Wood Craft Burnishing Stick
- Compatibility: Inkjet & Laser Printers, Rubber Stamps, Hand Drawing
- Application: Dry — No Water Required
- Profile: Ultra-Thin Film — Painted-On Look
- Instructions: Full step-by-step instructions included in every kit
🔄 Rub-On vs. Other Decal Methods
- No Water: Unlike waterslide decals — safe for raw wood, paper, and electronics
- Thinner Profile: Integrates with the surface finish rather than sitting on top like a sticker
- Immediate Handling: No drying time — project ready as soon as transfer is complete
- Clear Sticker Alternative: For smooth non-porous surfaces, see our clear inkjet sticker paper
How to Apply Rub-On Decals — 3 Steps
- Print: Set printer to High Resolution and Photo Paper mode. Print your design in Mirror/Flip mode onto the rough side of the frosted transfer film — mirroring is essential for text to read correctly once transferred.
- Adhere: Peel the clear liner from the adhesive sheet and apply the adhesive side over your printed design. Work slowly — the adhesive is very sticky and cannot be repositioned once applied. Smooth out any bubbles as you go.
- Transfer: Cut out your decal trimming close to the image. Peel the remaining liner, place the sticky side face-down on your clean dry surface, and rub firmly with the burnishing stick. Carefully peel away the frosted film to reveal your transferred design. Slightly bend the film at a corner to help separate the liner cleanly.
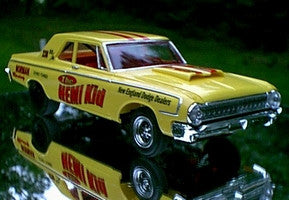
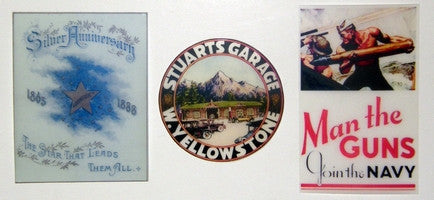
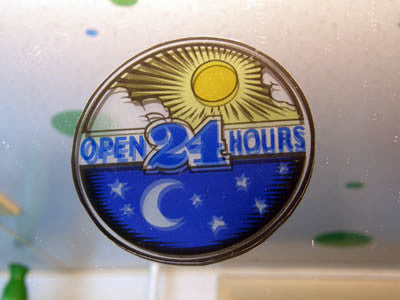
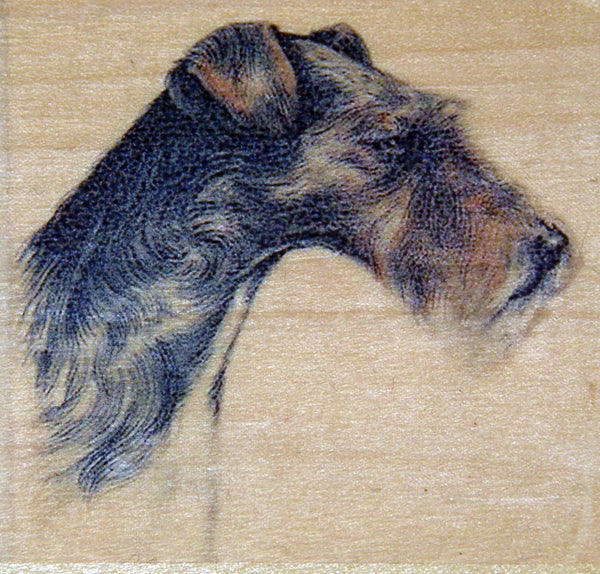
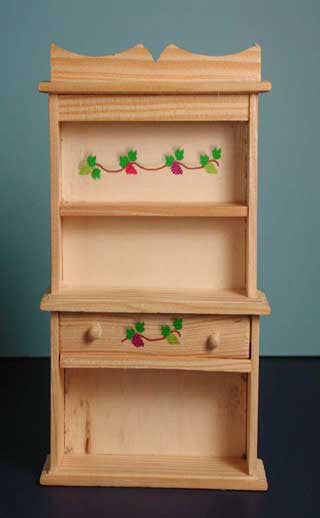
Rub-On Decal Uses — Furniture Transfers, Wood Crafts & Ceramic Decals
From antique furniture restoration to custom electronics decals, the dry transfer method works across every project where water or adhesive thickness would be a problem.
- Woodworking: Wood craft decal paper for furniture transfers, raw wood projects, and antique restoration
- Home Decor: Furniture decal transfer printable for painted-on decorative accents and custom signage
- Ceramics & Glass: Ceramic decal paper printable and glass decal transfer paper for dishware and home accessories
- Electronics: Electronics decal paper for laptops, tablets, and device customization
- Rubber Stamping: Rubber stamp transfer film — stamp directly onto the frosted film for non-printer transfers
- Craft & Mixed Media: Small batch decals, hand-drawn transfers, and mixed media art projects
- Professional Finishing: Apply decal then seal with lacquer or polyurethane for a factory-finish embedded look
Pro Tips
Mirror Mode: Always print in Mirror/Flip mode — text and asymmetric designs will read correctly only when the image is reversed before printing.
Factory Finish: For permanent furniture results, apply the decal to sanded wood then spray a light coat of clear lacquer or polyurethane over the top — decal edges disappear into the finish for a truly painted-on look.
Partial Sheets: You don't need to use a full sheet at once — arrange several small designs on one sheet, cut out what you need, and store the rest for future projects.
Liner Separation: To remove backing liners easily, bend a corner of the film slightly and the liner will separate cleanly from the adhesive.
Frequently Asked Questions About Printable Rub-On Decal Kits
Do I need to flip my image before printing?
Mirror Mode Required: Yes — print in Mirror/Flip mode so that text and designs read correctly once transferred face-down onto your surface.
What surfaces work best?
Best Surfaces: Smooth non-porous surfaces — polished wood, glass, ceramics, and plastics work best. For beginners, start with flat surfaces before attempting curved or textured applications.
Can I print just one small decal per sheet?
Partial Sheet Use: Yes — arrange multiple small designs on one sheet, cut out what you need, and store the remaining sheet for future projects. No need to use a full sheet at once.
Can I use rubber stamps instead of a printer?
Rubber Stamp Compatible: Yes — stamp directly onto the rough side of the frosted transfer film, then follow the same adhesive and burnishing steps. You can also combine stamping with printed elements on the same sheet.
Is there a sample option before buying a full kit?
Try-It Option: Yes — order a single try-it sheet to test the transfer process before committing to a full kit.
You might also like